How to connect FacePro1 Series, FA6000 or FA3000 with UTimeMaster Software
All our attendance devices with ADMS can support UTime Master which is to replace BioTime8.0. Here this article is talking about the visible light facial recognition series how to connect with UTime Master (ZKBioTime8.0).
You can click the link to know more about our FacePro1-P, FacePro1-TD, FacePro1-TI, FA3000, FA6000.
Firstly, you need install the UTimeMaster software to your PC, I advise you use the static IP for your PC, then your PC IP will be use server IP set in the device menu.
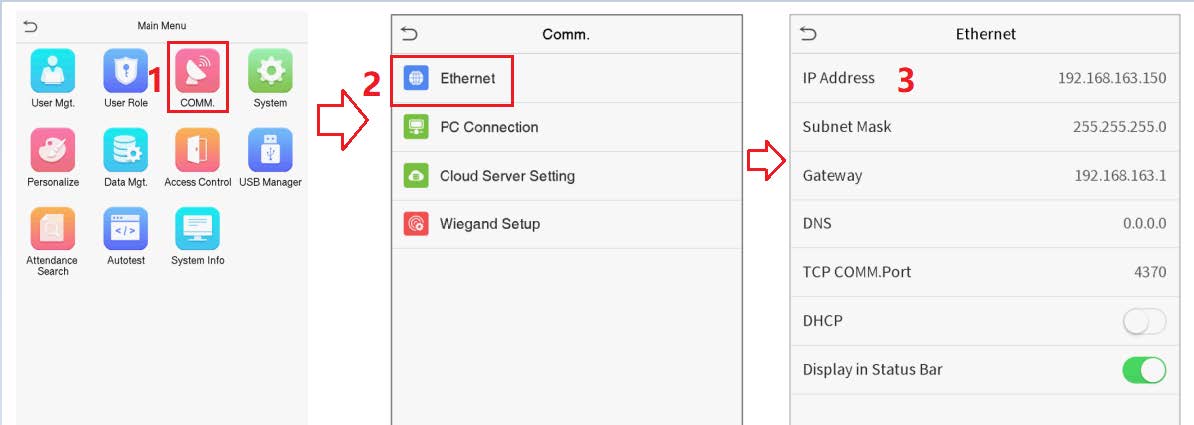
1. The device default IP is 192.168.1.201, if your LAN not use this network segment, you need change the IP address or enable DHCP function get a IP in the “Menu–>System Settings–>Network Settings–>TCP/IP Settings”.
2. Then set the server IP and port into the “Menu–>COMM.–>Cloud Server Settings.
Please Note: The IP 127.0.0.0 can’t use for the Server IP, it is the local host IP address, the IP can’t connect to this IP.
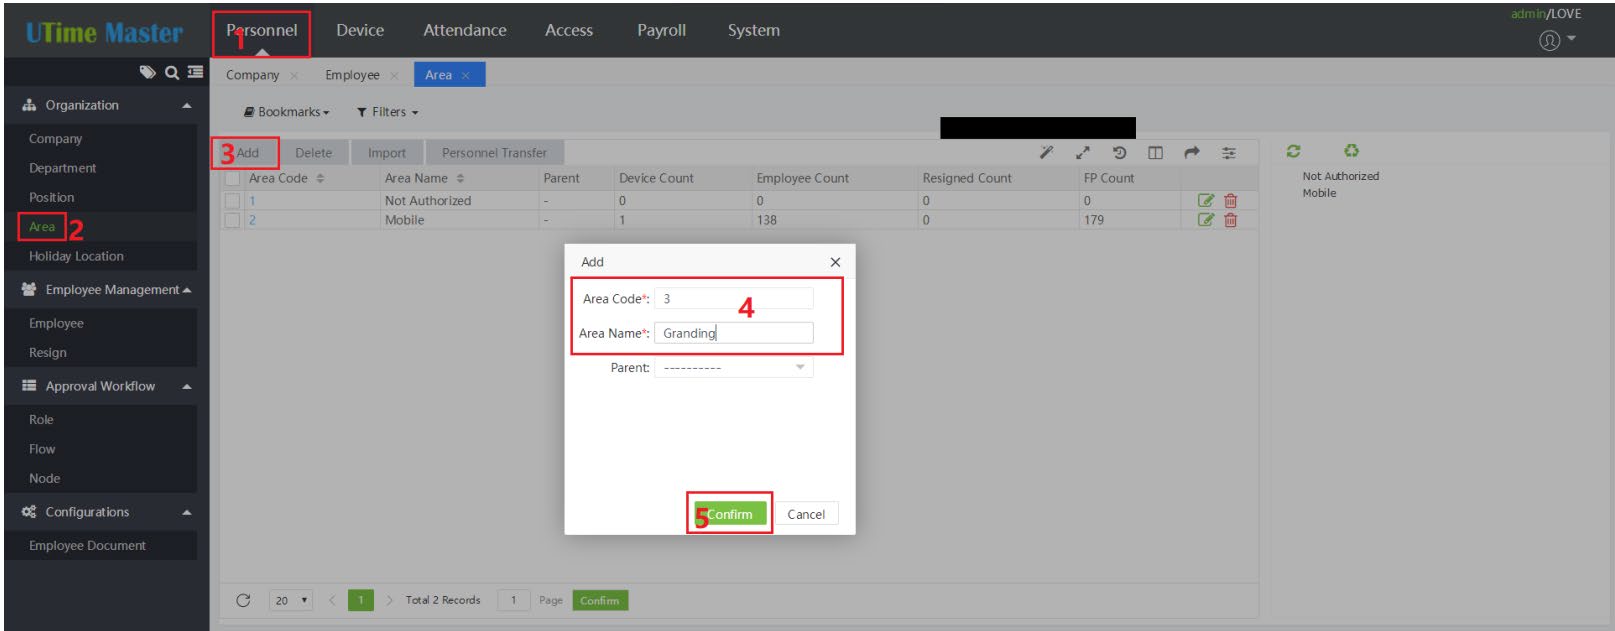
3. Then the device will auto connect with UtimeMaster software and add itself into the device list, you need add a new area firstly,
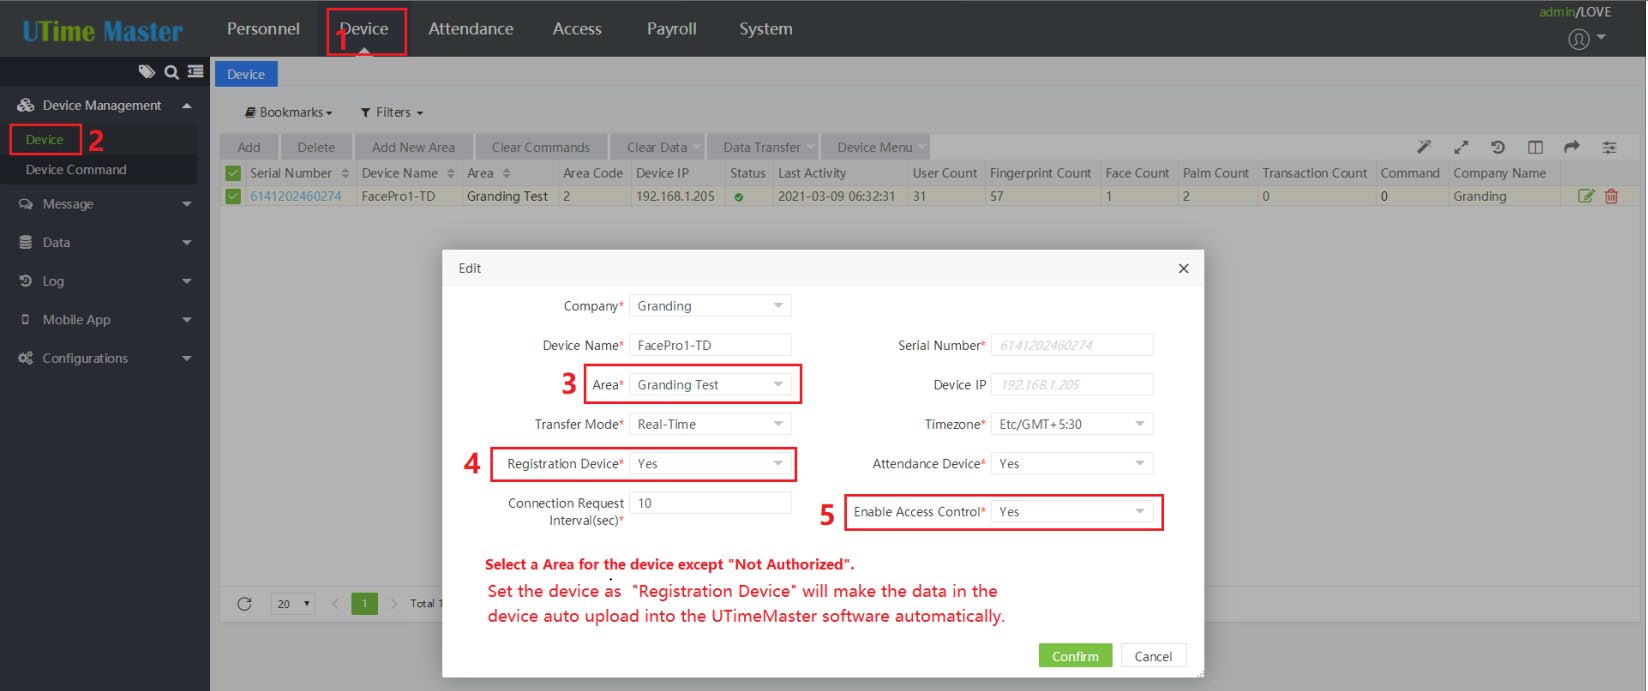
4. Then assign the new Area for the device, if you registration the fingerprint/palm/face/card/password in this device and you want the device upload all user data into the UTimeMaster automatically, please set “Registration Device” to “Yes, also I advise you set “Enable Access Control” to “Yes” too.
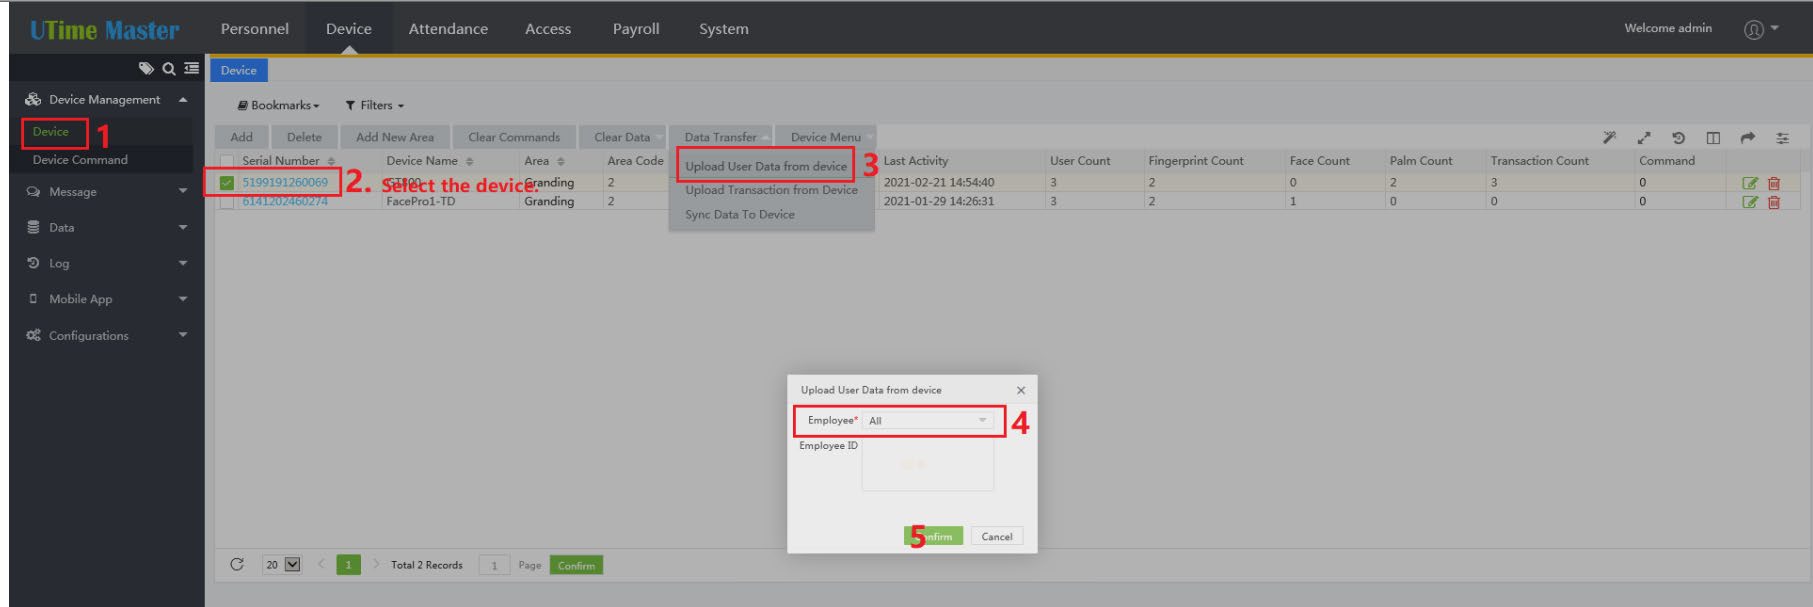
5. If the device not upload all user data to the UTimeMaster software, you can make the device upload all user data manually like the screenshot show as below
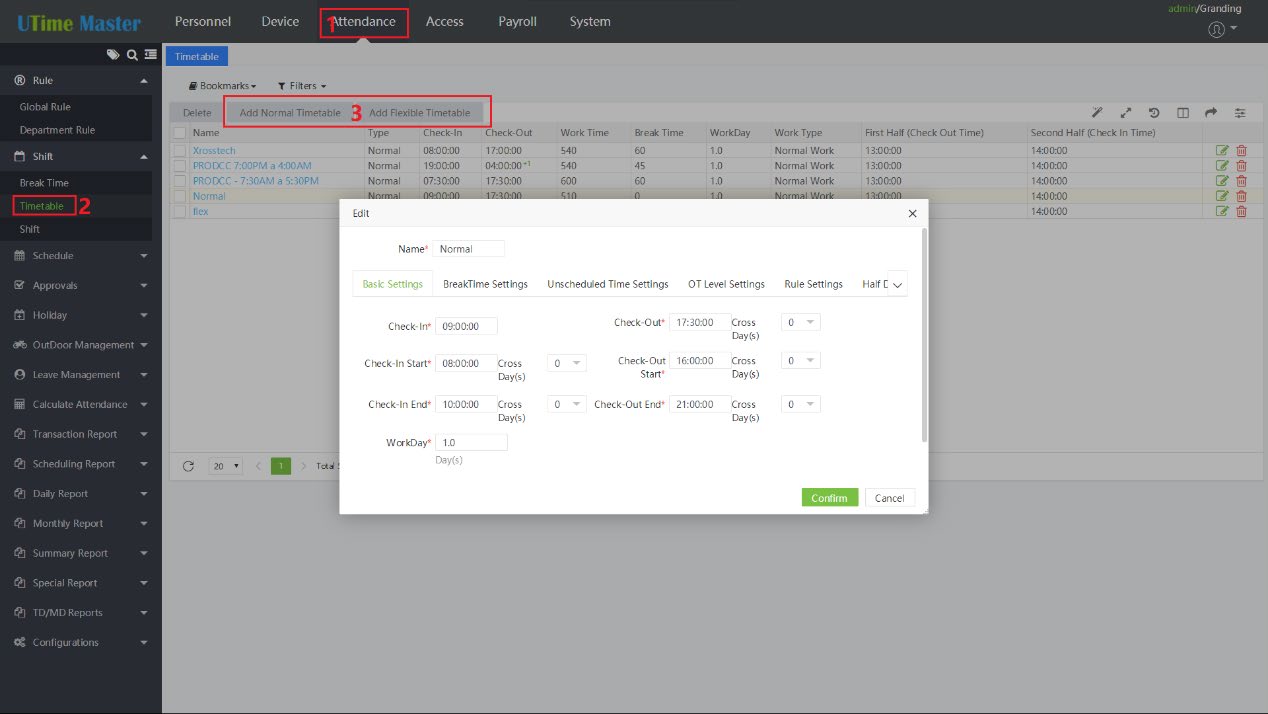
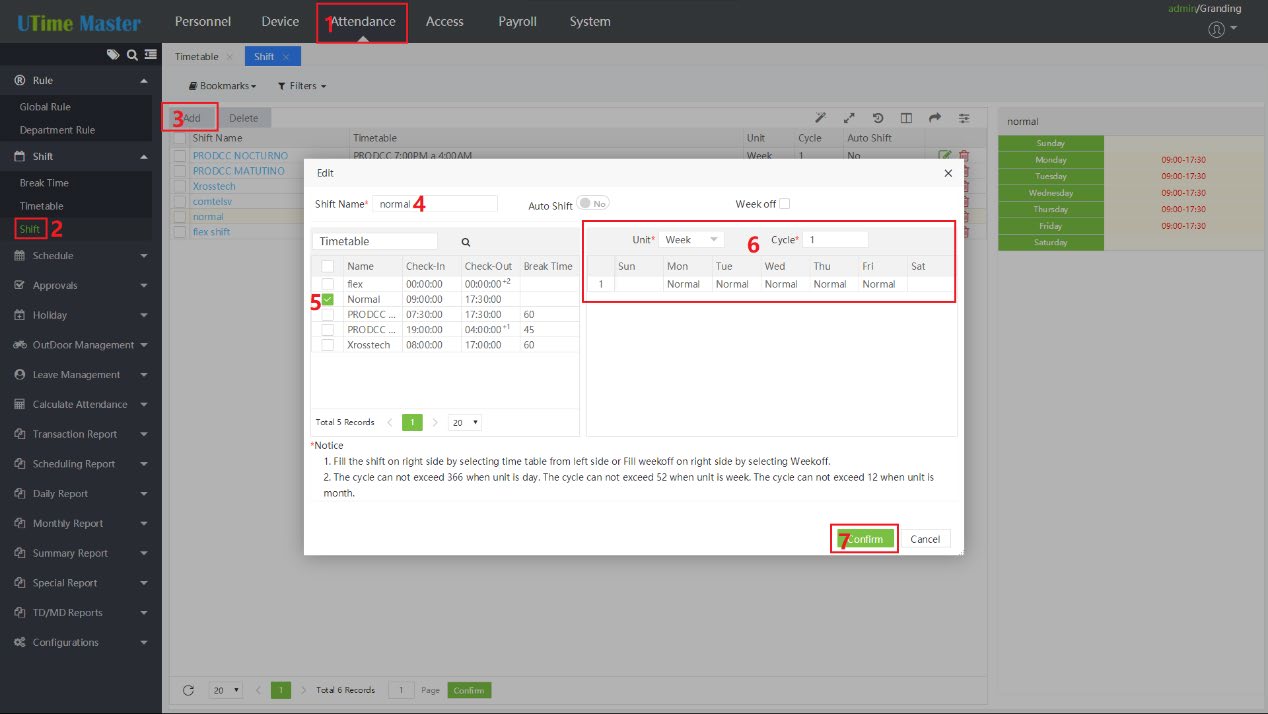
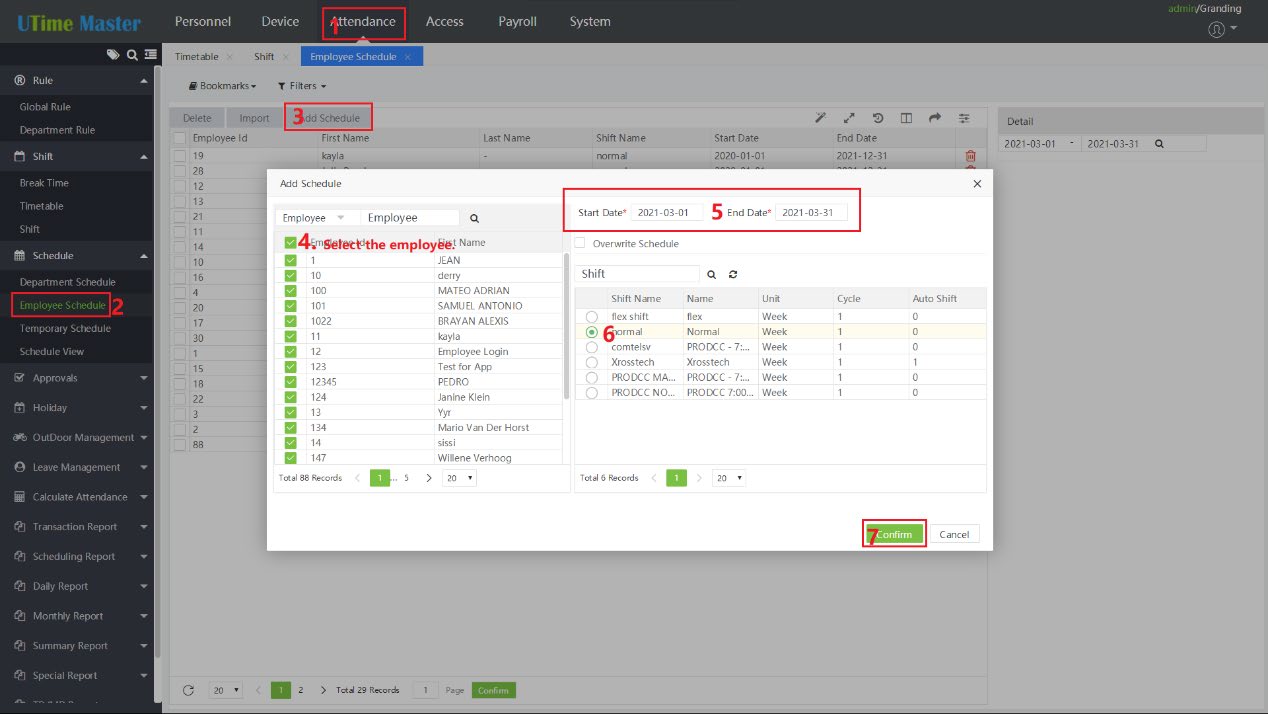
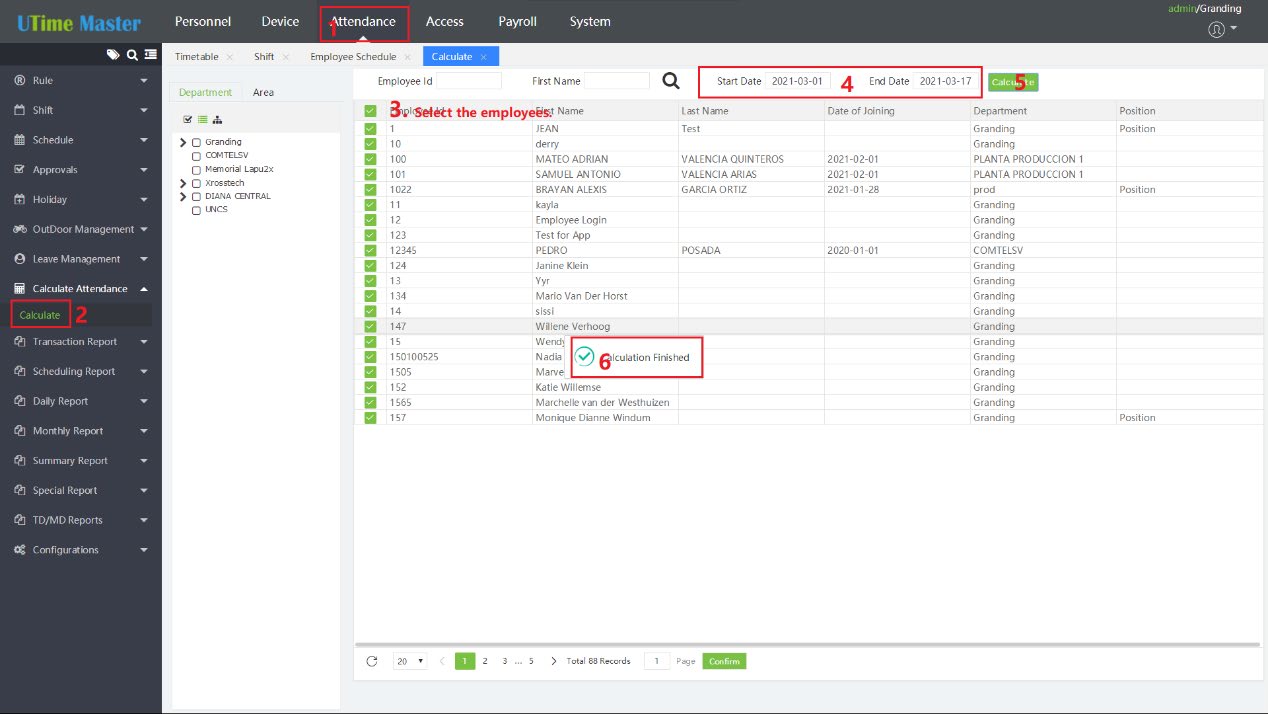
How to use Time Attendance function
1. Firstly, you need add the Time Table.
2. Add the shift.
3. Assign the shift for the employees.
4. You have to process “Calculate” button to calculate the attendance data before check any one report every time if you leave the “Attendance” page.
Post time: Jul-02-2021
